Gaelic Multigrain Struan

Tags

, , , , , , , , , , , , , , , , , , , ,

I have been on a struan baking frenzy of late.  Other breads have also come out of my kitchen in the past couple of months since I last posted, but the struan has become one of my favorites for many reasons.  It is a whole grain bread so that means it is really good for you however is not an especially dense bread.  The delayed fermentation method is the reason for that.  Also, the flexibility of whole grains that can be included, allows me the satisfaction of altering the flavor just a bit from batch to batch, which I love being able to do.  (One of my quirks<—I don’t like to make the exact same bread twice in a row, to which my husband will attest.)

Gaelic StruanI am using Peter Reinhart’s formula from his book, Whole Grain Breads and he calls it simply “Multigrain Struan.”  I call this recipe “Gaelic” only because struan is a Gaelic word and I like the sound of it.  His formula uses the delayed fermentation method which I talked about in a previous post, “Delayed Fermentation Method.”  His recipe makes one large loaf.  I have re-written it here to make two large loaves, and I will include some of the grain combinations which I have used and can vouch for their excellent flavors and textures.  There are dozens more to be tried.

GAELIC MULTIGRAIN STRUAN                   makes 2 large loaves

Struan means “the convergence or confluence of streams” in Gaelic. Reinhart says there is no official recipe for struan.  Struan is made using whatever grains are available at harvest time. 

*Precook these grains:               *May use these grains uncooked:

Barley, buckwheat, bulgar           Amaranth, Rolled oats, oat or wheat bran

Couscous, cracked wheat            Triticale flakes, multigrain cereal mixes

Grits, millet, quinoa, rice             Flaxseeds, and any type of flour or meal

Steel-cut oats, teff                    

Whole wheat or rye berries

SOAKER

¾ c. + 2T       or 113 g.               whole wheat flour

2 2/3 c.          or  370 g.             *any combination of cooked and uncooked grains

1 tsp.             or     8 g.               kosher sea salt

1 ½ c.            or  340 g.              milk, buttermilk, soy or rice milk. (I use whole milk)

  1.  Mix all of the soaker ingredients together in a bowl for about 1 minute, until all of the flour is hydrated and the ingredients form a thick, porridge-like dough.
  2. Cover loosely with plastic wrap and leave at room temperature fIMG_3535or 12 to 24 hours. (If it will be more than 24 hours, place the soaker in the refrigerator;  it will be good for up to 3 days.  Remove it 2 hours before mixing the final dough to take off the chill.)  I make the soaker and the biga the night before I intend to bake bread.

BIGA

3 ½ c.            or   454 g.             whole wheat flour

½ tsp.            or      2 g.              instant yeast

1 ½ c.            or   340 g.             spring water, at room temperature (~70 F)

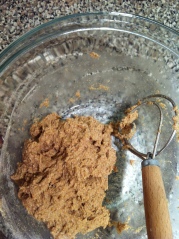
  1.  Mix all of the biga ingredients together in a bowl to form a ball of dough.  Using wet hands, knead the dough in the bowl for 2 minutes to be sure all of the ingredients are evenly distributed and the flour is fully hydrated.  The dough should feel very tacky.  Let the dough rest for 5 minutes, then knead again with wet hands for 1 minute.  The dough will become smoother but still be tacky.
  2. Transfer the dough to a clean bowl, cover tightly with plastic wrap and refrigerate for at least 8 hours and up to 3 days.
  3. About 2 hours before mixing the final dough, remove the biga from the refrigerator to take off the chill.  It will have risen slightly but need not have risen significantly in order to use it in the final dough.

FINAL DOUGH

Use all of the                              soaker

Use all of the                    .         biga

¾ c. + 2 T.     or    113 g.            whole wheat flour

1 ¼ tsp.         or      10 g.            kosher sea salt

4 ½ tsp.         or      14 g.            instant yeast

6 T.                or     113 g.           honey or agave nectar

2 T.                or      28 g.            unsalted butter, melted, or vegetable oil

Extra whole wheat flour for adjustments

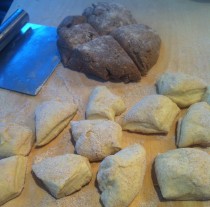
  1. Using a metal bench scraper, chop the soaker and the biga into 16 smaller pieces each (sprinkle some of the extra flour over the pre-doughs to keep the pieces from sticking back to each other).
  2. Combine the soaker and biga pieces in a large bowl with all ofthe other ingredients except the extra flour and knead with wet hands for about 2 minutes, until all of the ingredients are evenly integrated and distributed into the dough.  Wet hands make the kneading so much easier. The dough should be soft and slightly sticky; if not, add more flour or water as needed.  I have found that when I use a combination of grains which do not need to be  pre-cooked, there is little adjustment required.  When I use larger kernel grains that need to be precooked, I have more adjustment to make.
  3. Dust a work surface with flour, then toss the dough in the flour to coat.  Knead by hand for 3 to 4 minutes, incorporating only as much extra flour as needed until the dough feels soft and tacky, but not sticky.  Form the dough into a ball and let it rest on the work surface for 5 minutes while you prepare a clean, lightly oiled bowl.  (I use a 6 qt. rising bin with straight sides and oil it with Better Butter.)  You will notice the texture of the dough is softer after the 5 minute rest which seems rather magical to me.
  4. Resume kneading the dough for 1 minute to strengthen the gluten and make any final flour or water adjustments.  The dough should have strength and pass the windowpane test, yet still feel soft, supple and very tacky.  Form the dough into a ball and place it in the prepared bowl, rolling to coat with oil.  Cover loosely with plastic wrap and let rise at room temperature for approximately 45 to 60 minutes, until it is about 1 ½ or 2 times its original size.  The straight sideIMG_3730d rising bin is so helpful since I can see more accurately how much the dough has risen.
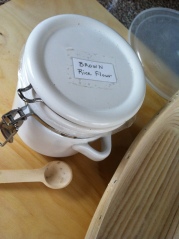
  5. Transfer the dough to a lightly floured work surface.  Divide dough in half with the metal bench scraper and form each half into either a loaf pan shape or a batard.  Place loaf into a greased 4 X 8 ½” bread pan, or place batards on a parchment paper dusted with semolina flour.  Mist the top of the loaves with pan spray (optional) or water and sprinkle with poppy seeds or sesame seeds.  Cover the loaves loosely with plastic wrap and let rise at room temperature for approximately 45 to 60 minutes, until it is about 1 ½ times its original size.  (Alternatively, you may place the loaves in bannetons if you like, for the final rise.  Wicker bannetons dusted liberally with brown rice flour will release the risen loaves very nicely.)
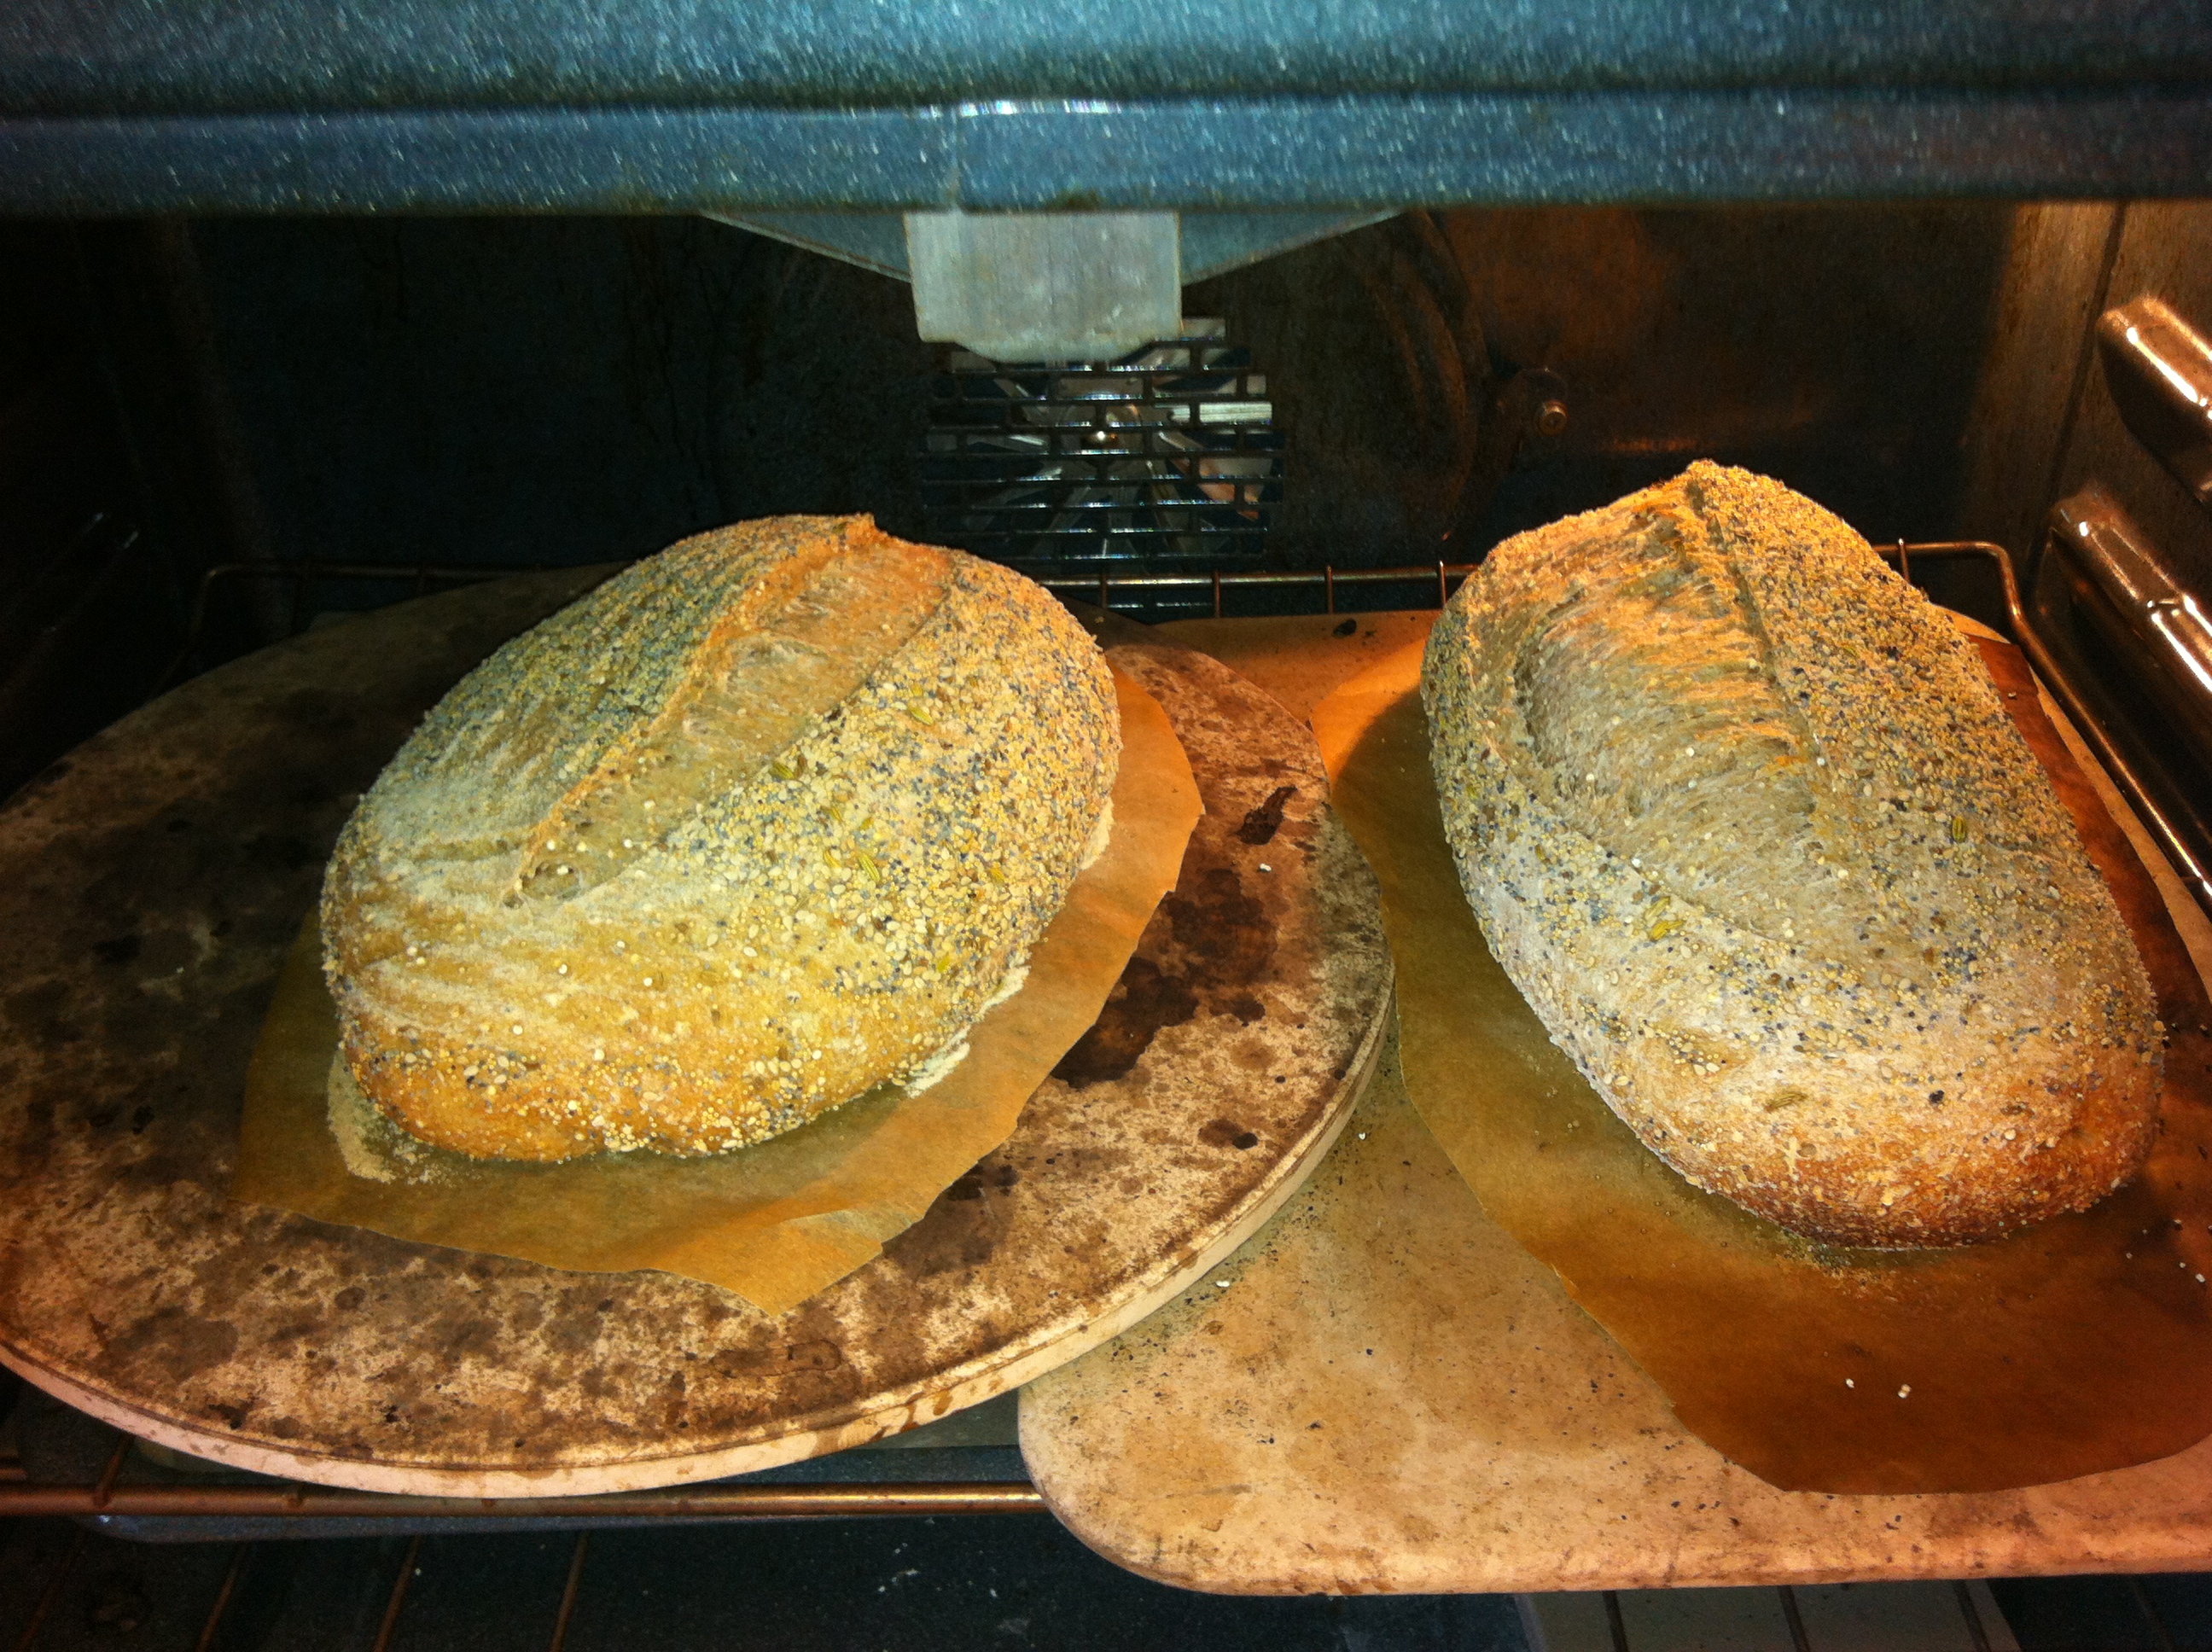
  6. Prepare the oven for hearth baking (unless you are using bread pans) and preheat the oven to 425 F.  Place the baking stone on the middle rack with a pan below into which you will put water to introduce steam just before sliding the loaves into the oven.   (I will write another post with more detail about introducing steam into the oven.)  When I use bannetons for the final rise, I will spray the top of the loaf with water or high heat baking spray immediately after turning the loaves out onto the dusted parchment.   Score the loaves using a very sharp serrated knife or lame dipped in water.  Place the loaves in the oven, and lower the temperature to 350 F.  Bake for 20 minutes.  Rotate the loaves 180 degrees and continue baking for another 20 to 30 minutes, until the loaf is a rich brown on all sides, sounds hollow when thumped on the bottom, and registers at least 195 F. in the center.
  7. Transfer the bread to a cooling rack and allow it to cool for at least 1 hour before slicing.

Here are some of the combinations of grains which I have tried in the struans.  We have liked them all so I certainly can’t say which are the tastiest.

1)  Quinoa – 170 g.; buckwheat groats – 100 g.; Flaxseed – 30 g.; Wild Rice – 70 g.; and because this turned out to be a very wet soaker, the next day I added 70 g. rolled oats and additional bread flour (rather than whole wheat) to adjust.  Very tasty!

2)  Kamut – 100 g.; Quinoa – 100 g.; Medium grind corn meal – 100 g.; Flax seeds – 40 g.; Wild rice – 30 g.  Excellent flavor!  The kamut is a very large kernel and so requires a long time to soften up a bit.

3)  Rolled oats – 100 g.; Fine grind IMG_3589cornmeal – 100 g.; Amaranth – 50 g.; Flax seeds – 50 g.; Flax seed meal – 40 g.  Very good!  Slight nutty flavor.  (This is the only combination I’ve tried that does not have at least one cooked grain in the mix.  I think there is something about the addition of a cooked grain which I like very much in the finished product.  I decided at this point to always choose at least one grain that is cooked.)

4)  Whole wheat berries – 100 g.; Wild rice – 100 g.; Flax seed meal – 40 g.; Medium grind corn meal – 50 g.; Whole grain teff – 40 g.; Amaranth – 40 g.   ( I really like the taste of amaranth.  That, plus the corn meal produce a satisfying crunchiness.  The whole wheat berries should cook until they seem softened, not mushy.)

There are so many more combinations that I want to try.  I’d love to hear from others about struans that they have made.  Happy baking!

Biscotti-Making-Experience

Tags

, , , , , , , , , , , ,

IMG_4253I participated in a holiday cookie exchange at the office last December which prompted a few of my co-worker friends to ask me to teach them how to make biscotti.  I had not thought my biscotti was anything to write home about, but I was certainly on board with hosting a party to make it with them!  It made for a fine evening of mixing, baking, slicing and tasting different types of biscotti, all the while sipping on a couple of nice wines.  (Wine is optional for hosting a biscotti party, but I highly recommend it).  When I mentioned this biscotti-making-experience in the company of another group of friends, they also thought that a biscotti party would be in order.  And so, I hosted a second biscotti-making-experience party just a week ago.  What a fun way to spend some time with friends, especially on a snowy, sleeting, yucky evening, and it just so happens that April in this part of Minnesota, is still snow-covered.  In fact, we have been homebound in a blizzard today.  My fingers are crossed that this was the last major snow dump of the season.  Sigh.  On to the biscotti………….

To plan a “biscotti-making-experience” party (let’s just call this as a “BME” party, shall we?) my first task was to choose which biscotti recipes to use.  I have searched out and tried lots of biscotti recipes in the last few years and so it was a tough call, but finally settled on four of them.  In advance of party day, I made copies of the four recipes for each friend to take home at the end of the evening.  I replenished my stock of unsalted butter (Land O’ Lakes, of course) and eggs, nuts (hazelnuts, pecans, and almonds), crystallized ginger and chocolate for melting.  I wanted everyone to be able to participate in each aspect of the BME, but yet have an assortment of biscotti cooled and ready to take home at the end of the evening.   The following describes how we had 4 kinds of IMG_3952biscotti ready to send home with each of the guests.

Recipe #1 Gingerbread Biscotti was to be dipped in white chocolate so I made it the day before so that it had plenty of time to harden before my friends came for the BME party.  Recipe #2 Chocolate Hazelnut Biscotti was in the oven for its’ initial bake when the guests arrived.  This biscotti was to have chocolate drizzled across the top, so again, we needed to allow time during the party for it to cool and firm up.   We had some soup while it baked.  Recipe #3 Orange Pecan Biscotti required at least a half hour to chill before shaping, so I mixed the dough ahead of time.   It was cold and ready to be shaped into the narrow, squat rectangles at the start of the BME party.  Recipe #4 Biscotti Toscani would be made from start to finish by the guests.  The only advance preparation that I did was to place the ingredients and the measuring utensils, etc. on the counter.   It is the simplest of the four recipes that follow.

Recipe #1           Gingerbread Biscotti                  30 servings

I actually doubled this recipe so that we could munch on these during the party and still have plenty left to send home with guests.  These are my favorite of the four biscotti.

½ c. butter, softened                                  1 tsp. ground ginger

½ c. sugar                                                 1/4 tsp. ground cloves

½ c. firmly packed dark brown sugar            1/4 tsp. salt

2 large eggs                                               1 c. almonds, slivered or sliced

2 c. all-purpose flour                                   1/2 c. chopped crystallized ginger

1 tsp. baking powder                                   8 oz. white chocolate, melted

IMG_42451 tsp. cinnamon

  1.  Preheat oven to 375 F on Convection Bake.   (Convection Bake enables you to bake two large sheets of biscotti one above the other at the same time.)  Beat butter with an electric mixer at medium speed until creamy.  Gradually add sugars, beating well.  Beat in eggs.
  2. Combine flour and next 5 ingredients; add to butter mixture, beating at low speed until blended.  Stir in almonds and crystallized ginger.
  3. Divide dough in half.  Using floured hands, shape each portion into a log 3“ wide and 1“ high.  (Tip:  I use a pair of bench scrapers to evenly shape the long ends of the biscotti “loaf”).  Place on a lightly greased cookie sheet, or USA Pan sheet.
  4. Bake 25 min.  Cool 5 minutes on cookie sheet; remove to a wire rack, and set aside until cool to the touch.  Reduce oven temperature to 325 F Convection Bake.
  5. Cut each log crosswise into ~5/8-3/4” slices with a serrated knife.  (A diagonal cut is characteristic for biscotti and will make a nice long piece of biscotti for dipping in coffee.  If you cut them just wide enough, the pieces will stand on the long edge and I prefer to bake them that way, on ungreased cookie sheets.)
  6. Bake 14 minutes.  If they won’t stand on the long edge, lay them flat, bake for 7 minutes, flip them over and bake another 7 minutes.  Cool completely on wire racks.
  7. Dip one end of each biscotti in melted white chocolate.  May need to thin the white chocolate with a little cream.  Place biscotti on wax paper until chocolate hardens.

Recipe #2            Chocolate Hazelnut Biscotti                    60 servings

Note:  To toast hazelnuts, place whole nuts in a baking pan and bake in a 350 F. oven until golden brown under skins, 10 to 12 minutes.  Wrap the nuts in a clean kitchen towel and rub to remove loose skins.  Lift nuts from towel (discard skins).

½ c. butter, at room temperature                 3 c. all-purpose flour

¾ c. sugar                                                  1 T. baking powder

3 large eggs                                                1 c. chopped toasted hazelnuts

1 T. grated orange peel                                 1 ¼ c. semisweet chocolate chips

IMG_38661 tsp. vanilla

  1. In a bowl, with an electric mixer on medium speed, beat butter and sugar until smooth.  Beat in eggs, orange peel, and vanilla until well blended, scraping down sides of bowl as needed.
  2. In another bowl, mix flour and baking powder.  Stir or beat into butter mixture until well blended.  Stir in hazelnuts.
  3. Divide the dough in half, and place each on ½ of a buttered or cooking parchment-lined 12- by 15-“ baking sheet, about 1” from outer edge.  With floured fingers, pat each strip of dough into a flat 13“ loaf, about 5/8” thick and 2“  wide.
  4. Bake loaves in a 350 F oven until golden, 15 to 20 minutes.
  5. When cooled 5-10 minutes, with a sharp knife, cut loaves crosswise into ¾ “-thick slices.  If theSeparate slices slightly and tip each onto a cut side. If they are wide enough to stand on a long edge, they will not need to be flipped over in oven.
  6. Return to oven and bake until cookies are slightly darker and firm and dry to the touch, 15 to 20 minutes longer.  Gently slide biscotti onto racks to cool completely.
  7. In a bowl set over a pan of barely simmering water (bottom of bowl should not touch water), stir chocolate chips often until melted and smooth, about 5 minutes.  Spread chocolate on one side of each biscotti.  Place cookies in a single layer, chocolate side up, on baking sheets, and chill until chocolate is firm, about 20 minutes.  Or, drizzle the warm chocolate (thinned a bit with cream) across the biscotti as they lay close together, on wax paper.

            Recipe #3            Orange Pecan Biscotti                 48 servings

    4 large eggs                                     3 1/3 c. flour

    1 c. sugar                                        2 tsp. baking powder

    IMG_39511 ½ T. grated orange rind

  8. 1 c. chopped pecans

    2 T. vegetable oil

    1 tsp. vanilla extract

    1 tsp. almond extract

    1)    Beat sugar and eggs at high speed with electric mixer for 5 minutes or until foamy.  Add orange rind, oil, and extracts, beating until blended.

    2)   Combine flour and baking powder; add to sugar mixture, beating well.  Fold in pecans.  Cover and refrigerate 30 minutes or until firm.

    3)   Divide dough in half; shape each portion into a log about ¾” high on a lightly greased baking sheet.

    4)   Bake at 325 F. for 25 minutes or until firm.  Cool on baking sheet 5 minutes.  Remove to wire racks to cool.

    5)   Cut each log diagonally into 5/8-3/4” slices with a serrated knife.  Place on greased baking sheets standing upright on long edges, if they will balance.

  9. 6)   Bake 325 F for 15 minutes.  Turn cookies over, and bake for 15 more minutes.  Remove cookies to wire racks to cool.  Store at room temperature in an airtight container.

    Recipe #4             Biscotti Toscani                     42 Servings

    We made these with the chocolate chips mixed into the dough.  If you wish, the chocolate can be melted and spread over the cooled biscotti.  Either way is delicious.

    1/3 c. butter                                      2 ¼ c. all-purpose flour

    ¾ c. white sugar                                1 ½ tsp. baking powder

    2 eggs                                              1/8 tsp. ground nutmeg

    1 tsp. vanilla extract                           ¼ tsp. salt

    ¼ tsp. almond extract                        ½ c. toasted almond pieces

    2 tsp. orange zest                             1 c. semisweet chocolate chips

  10. Preheat the oven to 325 F.  Grease and flour a large baking shee
    1. In a large bowl, cream butter and sugar until light and fluffy.  Beat in eggs, vanilla, almond extract, and zest.  Combine flour, baking powder, nutmeg, and salt.  Stir into the creamed mixture until just blended.  Mix in almonds.  (If you decide to add the chocolate chips to the dough at this point, increase baking times by 5 -10 minutes.  Divide dough into two pieces.  Form into long flat loaves about ½” tall and 12 inches long.  Place the loaves 2” apart on the prepared baking sheet.
    2. Bake in preheated oven for 25 minutes, or until a light golden brown.  Cool on a wire rack for 5-10 minutes.
    3. With a serrated knife, cut diagonally into slices about 5/8” thick.  At this width, they may be able to stand on the cookie sheet.  Bake an additional 10 minutes.  Transfer to a wire rack to cool.
    4. If you did not mix the chocolate chips into the dough, place chocolate chips in a small, microwave-safe bowl.  Melt chocolate in the microwave, stirring every 20 to 30 seconds until smooth.  (Be careful not to go overboard on melting the chocolate or it will seize up.)  Use a spatula to spread chocolate onto one side of each cookie.  To thin the chocolate, you may add a tablespoon or two of canola oil to the chips as they are melting.  Let decorated biscotti stand at room temperature until set.

    IMG_4209 I learned some clever things while hosting these parties.  One of my friends is an amazing truffle artist and taught us one of her truffle embellishment techniques. She uses a table fork dipped in melted chocolate to spatter across the biscotti.  Very pretty!   I would love to hear from others about any baking parties you may have hosted, and/or any of your favorite biscotti recipes and decorating tricks.  Happy baking!  BTW, I WILL return to blogging about making bread very soon.

Tracie’s Fabulous Carrot Cake

Tags

, , , , , , , , , , , ,

Slice Carrot CakeI have a niece (well actually, I have several nieces) who is quite an accomplished baker!  She makes beautiful and delicious wedding cakes, does specialty Christmas baking for many customers and bakes lots of other beautiful things to savor with both the eye and the taste buds.  It’s probably a good thing she lives a few hours away from me, or I would have gained lots of weight by now.  She shared this recipe for Carrot Pineapple Cake with me, which is one of the options that she offers for use in her wedding cakes.  It  is an absolutely fabulous and moist cake!  It has become one of my very favorite desserts.  Since then, I have found the same recipe in other places, (allrecipes.com rates it 5*) but since I first learned about it from Tracie, I am calling it by her name.

Yes, readers, this is still a bread blog, first and foremost, but I just gotta share this carrot cake recipe.  It is too delicious to keep still about.

Tracie’s Fabulous Carrot Pineapple Cake

Makes a 3 layer 9″ cake.  If making a 9 X 13″ cake, use only half the frosting.

2 c. all-purpose flour                    2 c. shredded carrots + 1/4 c., divided

2 tsp. baking soda                       1 c. flaked coconut

1 tsp. baking powder                    1 c. chopped walnuts + 1/2 c., divided

1 tsp. salt                                    1 (8 oz.) can crushed pineapple, drained

2 tsp. ground cinnamon

1 3/4 c. white sugar                             Frosting

1 c. vegetable oil                             2 (8 oz.) pkg cream cheese, room temp

3 eggs                                           1/2 c. butter, softened

1 tsp. vanilla extract                        4 c. confectioners’ sugar

Better Butter on Cake pans1.  Preheat oven to 350 F.  Grease and flour 3 (9″) cake pans or cut a parchment paper circle for the bottom.  I would flour that too.  (Tip: If you have not tried the recipe for Better Butter for greasing, pans, I recommend trying it now).

2.  Mix flour, baking soda, baking powder, salt and cinnamon.  Make a well in the center and add sugar, oil, eggs and vanilla.  Mix with wooden spoon until smooth.   Stir Nut chopperin 2 c. shredded carrots, coconut, 1 c. walnuts and well-drained pineapple.  It will be a very thick batter.  (Tip:  I have an inexpensive chopper that is designated solely for use with nuts.  Makes quick work of chopping and since only nuts are chopped in it, I don’t have to clean it very often.) 

3.  Spoon the batter into the three 9″ cake pans.  Because it is a heavy batter loaded with all those good nuts, etc., you will have to help spread the batter out across each pan evenly.  It will be only a thin layer of batter in each pan, but that’s okay.  It’ll puff up in the oven a bit.  Bake at 350 F for about 35 – 40 minutes.  (Tip:  If you were to bake this recipe in a 9 X 13″ cake pan, you would notice the center sink a little.  I don’t notice any appreciable sinking using the 3 round cake pans.)  Allow the cakes to cool completely on wire racks.

4.  To make the frosting, cream the butter and cream cheese until smooth and light.  Add the confectioner’s sugar and beat until creamy.   Frost the cake on the serving plate that you intend to use.  (Tip:  It will be easier if the serving plate can rotate easily for frosting the cake.)  Put about 3/4 – 1 c. frosting on the top of the first layer and Carrot cake for Easterspread evenly to the edge. Top with second cake layer and put about 3/4 – 1 c. frosting on that.  On the third layer, spread about a 1 1/2 c. or more of the frosting and pull it out to just beyond the edge of the cake.  Then spread frosting all around on the sides with a large spoon or spatula.  (Tip:  It helps to have a silicone spatula in one hand and a stainless spreader in the other.  Seems to work better for me when I put the bolus of frosting on the higher side of the cake and work it down, rather than vice versa.) How do other people do this?

5.  I am not bashful when it comes to sprinkling a generous amount of chopped walnuts on top of the cake and I also like to “throw” nuts onto the vertical sides.  (There’s probably some better technique to get walnuts on the sides, but I don’t know what it is. Anyone?  Anyone?  Buehler?) Then I place little bits of the left over shredded carrot on top of the cake and around the bottom of the cake, just for fun.  Refrigerate the cake.   Once people taste this, you probably won’t have it around very long.  Enjoy!

As you can see, I made this cake for Easter dessert.  Bunnies are totally optional.  Happy baking!

P.S.  I’d love to hear from bakers about your techniques for frosting the sides of a cake and for applying nuts, etc. to the sides. 

Betty’s (Potato) Lefse

Tags

, , , , , , , , , , , , ,

lefseIt has been too long since I posted a recipe.  I want to introduce you to lefse, as I know it.  For those of you unfamiliar with lefse (pro. LEHF-suh), it is a Norwegian flatbread which looks a little bit like a large tortilla, or a round, slightly burnt napkin.  But I assure you, it tastes like neither of those.  I come from a long line of lefse makers in this country.  About 3/4 of my ancestors came to this country from Norway sometime between 1870 and 1895, from places such as Bergen, Gudbrandsdalen, Ringerike, and Telemark.   The Norwegian emigrants, of course, brought many of their customs with them, although as might be expected, they have become somewhat diluted on this side of the ocean.  Only a few years ago, I was surprised to learn when my husband gave me a lovely cookbook called The Norwegian Kitchen, (published in Norway, translated to English) that not all lefse is made using potatoes.  I was astonished!  I was raised on the ritual of lefse, for the major holidays and it was never called “potato lefse.”   It was just “lefse” and I presumed that all lefse was made the way it was made in my hometown, the first Norwegian settlement in Minnesota.

vikingshipBTW, if you are interested in experiencing the celebration of a big Norwegian holiday, Constitution Day, or Syttende Mai (Seventeenth of May) without going to Norway, you may do so by visiting Spring Grove, Minnesota during the days surrounding May 17th each year.  It is a town-wide three day celebration. There is the crowning of a Syttende Mai King and Queen, a parade, music and dancing, Norwegian crafts such as rosemaling (a style of painting), and hardanger (a type of stitchery), a Lutheran church service delivered in Norwegian, and of course, a huge lutefisk (dried cod soaked in lye) dinner which naturally includes lefse on the menu, as well.  When I was a child, it was not unusual to hear people of my grandparents’ age speaking Norwegian when they met on the street in Spring Grove.  My mother, a third generation American, did not learn English until she attended country school.  I find it sad to think that there is little Norwegian spoken spontaneously there these days, as our grandparents and great grandparents have passed on.  It is still possible, however, to hear the Norwegian National Anthem being sung.  In fact, my entire graduating class can sing it on a moments’ notice; this made for a rather startling class reunion for my amazed husband a few years back , but then, he’s easily astonished by a group of people who like so much white food with butter–at least that has been his observation among the Norwegian Americans that he has met.  But I digress.

lefseand brown sugarOf the 20 recipes for lefse in the aforementioned cookbook, only 4 of them contain potatoes.  And two of those do not use the whole potato, but only potato starch!  What?  Who knew?  I have never tried to make any of those other recipes for lefse; I enjoy the familiar, comforting taste and texture of the potato lefse of my childhood, and so I continue to make it every Christmas season.  My daughter, although little interested in kitchen work, wants to help me make it each time, which seems to fertilize my Norwegian roots.  She and I always enjoy eating a piece or two while they’re still warm, smeared with a little butter and brown sugar (not as much as in the picture to the right). Then, the lefse round is cut in half, or in fourths and the pieces rolled up and eaten.  Mmmmmmm– heaven.

Although I could choose one of the potato recipes in The Norwegian Kitchen, I prefer to use the recipe used by my mother and her mother.  It has been passed on to me from one of my older sisters, whom I would say deserves the title of “best lefse maker that I know” and for that reason, I call the recipe by her name, “Betty’s Lefse.”  Not being one to call attention to herself, I imagine her reaction to this decision will be less than thrilled.  But it is only fair, I think.  Of the six daughters that my parents raised, she and I are the only lefse makers.  Ah, the mighty pen wields such power!

Betty’s (Potato) Lefse        (makes about 20 pieces ~12″ in diameter)

Ingredients:ricer

  1. 15 large potatoes (Russet or Idaho; you want a relatively dry mealy potato for lefse.  I foolishly made it once using a wetter variety of potato that I had on hand at the time. Horrible experience.  Horrible!  My hands hurt just thinking about the effort I had to put into trying to adequately rice the wet potatoes.  This is now on my list of “dumb things I’ve attempted in my life”).
  2. 1 1/2 sticks of soft butter (only real butter will do; don’t even think about a substitute)
  3. 1/2 c. cream
  4. 3 tsp. salt
  5. 3 tsp. sugar
  6. ~3 c. all-purpose flour

Preparations:

The night before you plan to make lefse, peel and boil the potatoes.  When they are just cool enough to handle, put them through a ricer into a very large bowl.  Remove any potato eyes, green or dark parts that don’t want to go through the ricer.  While the riced potatoes are still warm, add the butter, half & half, salt and sugar and mix thoroughly by hand.  If you have trouble finding a ricer, try looking at a hardware store.  They’re not hard to find in the Midwest but I don’t know about the rest of the world. 

Before you go to bed and when the mixture has cooled a bit, add the flour a cup at a time, again by hand.  The mixture will feel soft and barely tacky.  It will form into a nice big ball of dough.  Cover the bowl and refrigerate overnight.

The next day, remove the dough from the refrigerator AFTER you have prepared the following items that you will need in order to bake the lefse:

A nonstick surface for rolling out the lefse.  I use a large wooden plywood board.  I would not use my counter top because it’s too slippery.  You could use a large silicone pie crust mat that is made for that purpose or you may opt to buy a large round taut cloth covered surface that is made specifically for rolling out lefse.  The nice thing about that is that when you flour the fabric surface, it really minimizes likelihood of the lefse sticking to the work surface.  I have never had one of those special lefse cloths and I am happy enough with the set up that I use.

grooved rolling pinA wooden rolling pin with a cloth sock covering.  Potato lefse dough is very tender.  You will need to flour the sock covering the rolling pin very well.  As you can see, the rolling pin has parallel grooves that extend the whole length of the roller.  The grooves are very helpful in making a surface that the sock will cling to, and also help to minimize the risk of the rolling pin sticking to the soft lefse dough.  A marble rolling pin is definitely too heavy.  Again, these items are not hard to find in the Midwest, but I’m not sure how hard they would be to find in other parts of the U.S.  I’m sure that wherever the original Norwegian emigrants settled, in Minnesota, Wisconsin, Iowa and North Dakota they can be found, certainly in hardware stores if nowhere else.  Companies such as Bethany Housewares and Nordic Ware make these items and they can be ordered online.

lefse griddleA lefse griddle.  Preheated to ~375 F.  Originally, of course, lefse was made on a large iron surface over an open hearth but that would be really difficult to replicate in my house.  I don’t recommend going to that extreme to be authentic about the process of baking lefse.  I have heard of people who have made lefse on their stove top with a large cast iron griddle, or fry pan, but they are more courageous than I am.  My lefse griddle is made by Bethany Housewares, which also makes other Scandinavian cooking and baking utensils.  If a lefse griddle is not something readily available in your area of the country or world, you could use a large electric pancake griddle if available.

IMG_4093A lefse stick.  This is a long wooden stick, somewhere around 22″ long and 1 to 1 1/2″ wide.  The two long edges are beveled smoothly so that the stick can get underneath the rolled out lefse and pick it up from your work surface and transfer it to the lefse griddle.  I have two sticks but you only need one.  I guess I prefer the one that is a little wider.  If you’ve ever made pie crust, you probably have a stick that you use to pick up the rolled pie crust.

A stack of kitchen towels.  Unless you have a lot of them, you may need to raid your bath towel supply, too.  I fold each towel in half or fourths, depending upon the size of the towel and have them at the ready next to the lefse griddle.  I stack mine on top of a large cooling rack.  The reason for the towels is that after each piece of lefse is baked, it will be removed to a towel and covered by another layer of towel.  By the time you are done making lefse, you’ll have a big pile of lefse with towels layered between.  The towels prevent the warm lefse from sticking to each other, Set-up for lefse makingand also prevent them from drying out while you finish baking the rest of the lefse.

You can see how I set up my work area.  I don’t have one long counter that will accommodate the bowl of dough, the work surface, griddle and stack of towels, so they are divided between two counters opposite one another.  The fact that I have to lift the rolled out lefse and transfer it over the open floor and onto the griddle opposite might give some folks the willies.  I want to point out, however, that I’ve never had an accident.  Just for fun, I’m including an old photograph of my mother making lefse in her farm kitchen.  The year would have been lefsebakingcirca 1968.

Directions:

With the above items assembled in your work area, you are ready to remove the dough from the fridge.  It’s important to have the dough remain cool while you work with it.  If you think that the process is rather slow for you, or if you have doubled the recipe, I’d suggest dividing the dough in half and leaving half in the refrigerator while you work with the first portion.   Keep any dough which you are not currently working with, covered to prevent moisture loss.

Flour your working surface lightly.  Scoop out a ball of the dough, about the size of a baseball.  Before putting it down onto the floured surface, I like to pat the ball into a thick pancake between my hands, attempting to keep a relatively round shape.  When I can’t do any more with my bare hands, I lay it down on the floured surface.  With a well floured rolling pin, roll the dough east and west and then north and south, alternating the direction each time.  After only a few rolls of the pin, check to make sure that the dough is not sticking to the board, by running the lefse stick underneath and flipping it over.  Continue to roll out the lefse on the opposite side.   Re-flour the board lightly and the sock as needed, but take care not to over-flour the dough.  Too much flour = tough lefse.  When you are finished rolling out the lefse, it will be about the thickness of a flour lefse sticktortilla.

Slide the lefse stick underneath the entire piece of lefse, making sure that it is not stuck to the board anywhere.  Then with the stick positioned just off of center, lift the lefse from the work surface and lay it down on the hot griddle.  If you’ve never made a pie crust from scratch, this may feel risky, but you’ll get the hang of it quickly.  As you move the lefse stick over the griddle, simply turn the stick over and over and the lefse will lay itself onto the hot griddle.  If the lefse ends up really crooked such that you are bothered by it, you have the first few seconds after it is on the griddle to very quickly and lightly move it with your open hand.  It’ll slide easily and you won’t burn your hand because the lefse isn’t hot yet.

Lefse bakingYou will know when the lefse is ready to be flipped over when the edges of the dough look “drier”.   It’ll probably take 2 – 3 minutes.  It doesn’t harm anything to lift up the edge of the lefse to look at the surface next to the griddle.  It should have large brown spots here and there.  There may be places where the lefse will develop large bubbles, too.  That’s okay.  Sometimes I tap them with my lefse stick to remove the air inside just so that the other side has  enough contact with the heat to bake it through, but I wouldn’t worry about that.  Then, just turn the lefse over with the stick as before.  The second side will bake more quickly than the first.  When both sides are baked, lift the lefse off and lay atop the first towel and cover with another layer of towel.  Yea!  One down.  About 19 to go!

Betty made lefseWhen you get comfortable with the length of time it takes for the lefse to bake, you will be able to get one piece of lefse rolled out and ready to place on the griddle while the previous one is baking.  The time it takes to do the rolling and the baking are nearly the same.  How convenient is that?

When you are all done baking the lefse, wait until the heat has dissapated from the lefse before folding the pieces into fourths and wrapping in plastic wrap to keep in the refrigerator or freezer.

Please give yourself a break if you think that your first pieces are too thick, or too tough or baked too long.  I always figure that my first piece or two is not going to be as nice as the ones to follow.  It takes just a bit of practice to get just the right griddle heat, and the right thickness of the rolled lefse, and to avoid having it stick to the work surface without adding too much flour.  By the third or fourth piece, you will feel like you have become pretty good at this lefse making thing.  Pat yourself on the back.  Or, better yet, have someone else do it, your hands will be a bit floury.  Happy baking!

Embellishments: #2 Washes and Toppings for Bread

Tags

, , , , , , , , , , , , , ,

An egg and milk glaze was spread over the loaf before baking

An egg and milk glaze was spread over the loaf before baking

A wash or a glaze as it is sometimes called, is a finish that is gently brushed on the proofed loaf just before scoring (if you plan to do so) and sliding it into the oven.  In this context, I am not referring to the sweet paste or glaze that we think of with a glazed doughnut or a sweet cinnamon roll; those are often applied after the bread has been removed from the oven.  The wash that I am talking about here does not so much add flavor to the loaf, but rather, contributes to a nice golden brown crust and a beautiful sheen.   Additionally, a wash will provide a moist finish which will encourage toppings to cling to the surface as it bakes.  A wash serves those two functions in bread baking, however a Whole Wheat Genzano Country Breadwash is not always desired.  There are some beautiful breads that I do not embellish with a shiny crust.  For example, I may not want a wash on a large peasant bread.  For those, I may prefer to pursue the very dark, crackly appearance found with a very hot steamy oven.  So, the first order of business is for the baker to decide if a wash is desired at all.  And if so, which one.

A very basic wash can be made by adding 2 – 3 tsp. of water to a lightly beaten egg.  Apply the wash with a very soft brush that will not stress a tenderly proofed loaf.  Avoid  those pastry brushes that can be quite stiff.  My favorite brush is made of silicone and is about 2″ wide so that I can quickly cover the loaf with the wash.  There have been times when I didn’t take care to cover the entire loaf with the wash, and the result is a rather streaked, less than attractive finish.

There are a few little modifications that can be made with the wash.  Milk can be used in place of the water, which will make a somewhat warmer looking finish.  If, for some reason, you want a very pale finish, you might use just the egg white and some water for the wash.  If you really desire a darker finish, you might add a 1/2 tsp of honey, or even a little brown sugar.  Both will darken the crust.  Using my imagination a little, I could darken the wash with a bit of water in which raisins were boiled.  Or even just a dab of molasses in the wash.  That might be great on a loaf of anadama bread which has molasses in the dough already.

IMG_2815If you forgot to apply a wash before baking, you might choose to brush the baked loaf with butter, or with oil, although I prefer the taste of butter, unless the bread is a focaccia in which case, olive oil is the best!  Be aware, though, that when you brush the loaf after it has been baked, it will soften the crust a bit, in case that is not what you were going for.  Some people brush the bread with milk before baking and again with butter after baking.  My mother always brushed her loaves with butter.  (Land O’ Lakes butter, to be exact).  I have never actually tried the milk and butter washes, but I am thinking that next time I make a batch of dinner rolls, I will try that.

Laurel Robertson suggests the following wash in her Laurel’s Kitchen Bread Book, for use on rye bread; or on any other bread, for that matter.  She says to stir 1/2 tsp. of cornstarch into 1/4 c. cold water on the stove  “Boil it for 5 minutes, or until it clears completely.”  She suggests that since this is such a small amount, you may wish to double or triple the recipe and keep it in the refrigerator for a week or more.  She says to brush the wash on the loaves after baking; return the loaves to the oven for a minute.  Or, you can brush them halfway through the bake and again at the end, as above.  I have never tried this myself, I think, because I like to sprinkle other toppings on my rye bread.

IMG_3726And now, on to the toppings, which I love to play with.   I have a whole shelf of mason jars containing an assortment of goodies (nuts, seeds, bran, oats) which I have scoured from my local Whole Foods Co-op to try out for toppings on my breads.  By the way, I have to say that I have been so happy to have a Whole Foods Co-op nearby.  It is wonderful to be able to buy just a small amount of something to try out.  I have several favorite seeds:  raw pumpkin, sunflower, flax, sesame, poppy, caraway and amaranth.  (I keep the poppy and sesame seeds in the refrigerator, though.)  A woman that I took a bread baking class from, gave me a recipe which I believe came from Nancy Silverton’s Breads from the La Brea Bakery.   Contained within that recipe is the following seed mixture which is awesome!  I believe her exact words were, “this is crazy good.”  She was right!  Mix the following:

IMG_3749Seed Mixture:  2 T. amaranth, 1/2 c. sesame seeds, 3 T. poppy seeds, 3 1/2 T. anise seeds, and 1 T. fennel seeds.  Mix these together and spread on a cookie sheet.  Batards may be spritzed with water and rolled in the seeds before the final proof.  I keep the remainder of the seeds in a mason jar in the fridge for future use.  Sometimes I use that same seed mixture on a somewhat milder flavored bread dough by spritzing just the top of the loaf with water and sprinkling with the seed mixture.  Also awesome!

Quintessential French Sourdough (Pain au levain)I always keep pecans, walnuts and sliced almonds on hand, for the occasional bread that calls out for one of them.  Pine nuts need to stay in the fridge.  Rolled oats make a nice topping as does wheat bran and flaxseed meal.  Sometimes the only “topping” I want is plain flour.  That can be beautiful on a loaf that is then scored and popped into the oven to show off its’ inner crust with a lovely oven spring.  Laurel’s Kitchen Bread Book also recommends choosing an embellishment that “looks” like one would expect the bread to taste.  Good common sense, I think.   If your guests’ eyes tell her she’s about to eat a piece of cinnamon bread, and then her mouth tastes something like a sour rye bread, the experience won’t be very pleasant, even if the bread is really a good rye.

The next embellishment I will talk about will be scoring.  More fun to come!  Happy baking!

Artful Bread — #1 Shapes for Bread

Tags

, , , , , , , , , , , , , , , , , ,

I admit that part of my fascination with bread making has to do with the challenge of making a visually appealing loaf of bread.  Obviously, the taste is the most important thing, but coming in a close second (okay, maybe third) would be the aesthetic quality Flax, Sesame, and Sunflower Rye (Dreikornbrot)of the bread.  As I look at breads from around the world, I see such an array of beautiful breads, using various shapes, glazes, scoring (slashing) patterns, stencils and toppings.  I certainly cannot do justice to the entire planet of breads, however, I have selected some basic shapes to show you as a way to convey that breads are works of art found internationally, meant to be appreciated by the eyes, as well as the nose and taste buds.

Before there were metal loaf pans, there were free standing loaves which we now call “hearth breads.”    Anthropologists suggest that breads were likely first made in the Chewy Pumpernickel Crumbpart of the world that we refer to as the Fertile Crescent, an area which would have included Mesopotamia, and current day Iraq.  That region of the world is often considered to have produced the first farmers; the first humans to figure out that it was possible to live in one place on the earth rather than move across the landscape following herds of whatever was tasty.  Way back then, the Fertile Crescent was more fertile than it is today; the climate was a bit kinder (as opposed to desert heat) and it had plenty of rain fall and therefore was a great region for roaming nomads to discover lots of naturally occurring foods that wanted to grow there.  At some point, two men (Bud, the atlatl thrower and Dave, the spear thrower) looked at each other and one of them said, “I’ve had it with picking up and moving household every new moon.  Me and (holding up 2 fingers) Women going to stay put and eat the food that grows here.  Maybe see you and the Others when the Giant Gronka come back this way.  BTW I’m keeping (holding up 3 fingers) Goats and Dog here with me.”  At which point, the two men either agreed amicably to divide the property and go their separate ways, or more likely, they didn’t agree on how things should be divided up, and thus began the conflict in the Middle East.

Well, it is only a hop, skip and a jump from the Fertile Crescent to the surrounding areas now known as Italy, Greece, France, Turkey, Hungary, and so on.   It makes sense to me now that many of the breads that we are most familiar with had their origins not far from the Fertile Crescent. Thus, I will be using many of the terms that the French and Italians came up with to describe their breads.  France and Italy share a common border and so it is not surprising to see evidence of the give and take of ideas about bread making, and language about bread crossing their borders.  Although I do not speak French, I have a sister-in-law who does, and have asked for her assistance in correct pronunciation of the French breads.

French bakers call the round loaf a boule (pro. Bool) meaning “ball.”  A boule made with a white flour dough and very active starter is going to remain fairly round, like a ball.  The same shape made with more whole wheat flour and other ingredients may not rise as much and may be less spherical, but would still be called a boule.   When the boule is single serving size, we call them buns, or in Italy, they may be referred to as puccia (pro. poo-CHEE-ah) meaning “little cheeks.”  How cute is that?  Conversely, when you see a very large round loaf of bread, it is frequently referred to as a peasant loaf, or the French may call it a miche (pro. meesh) meaning “butt cheek.”  Who said that bread bakers lack humor?

English Leaven Bread with Potatoes and AleHave you noticed that in movies, all NYC grocery shoppers are depicted carrying a long, slim loaf of bread?  (Must be some rule of urban cinematography or something).  Some readers may say, “ah, ze French bread.”  I hereby declare that the term “French bread” is entirely inadequate.  The long slender loaf may be called a baguette meaning “stick” or “rod.”  It may also be referred to as a baton (same meaning).   A shorter loaf with a broader girth is called a batard (pro. ba-TA-rd).  The Italians have another name for a similar loaf but which has more predominantly pointed ends and a plump middle, a torpedo meaning, what else, “torpedo.”  The Italians also have a miniature version of a baguette which they call a ficelle (pro. fee-CHEH-lay).  I haven’t found a translation for “ficelle.”  Rather than cutting a ficelle, it would be eaten whole, as a stick of bread.

Beyond the sticks of bread, there are a number of breads which fall into a category that we call rustic breads.  In this context, as I understand it, “rustic” refers to the doughs that are rather wet and do not maintain an upright shape in proofing, nor in the oven.  A wet dough allows a bread to develop a very light, airy crumb with large holes.  One of the rustic breads is ciabatta (pro. chee-ah-BAH-tah) meaning “bedroom slipper.”  Apparently, somebody was reminded of foot apparel when they looked at this loaf.  I can’t see it myself, but am willing to accept that title.  Ciabatta is sometimes used as special sandwich bread.  I like it dipped in olive oil.  Another Italian bread is IMG_3322called a filone (pro. fee-LO-nay) meaning “long loaf.”  But rather than it representing a long loaf, to me it describes a rather angular, squarish, loosely formed bread.   The other wet Italian bread that comes to mind is focaccia (pro. fo-CAHSH-yah).  I find no translation for that word but we certainly recognize it as a flattish bread, sometimes stuffed with garlic, onions, sweet red peppers, or cheese or topped with those sort of ingredients.  A focaccia dough is used to make a bread that we call fougasse (fo-GAHS) which translates to “focaccia.”  Perfect, huh? To my knowledge, we call a bread fougasse for the way that it is cut through and pulled apart to allow as much baked crust surface as possible.   The more bread surface that is exposed to the hot oven air, the more caramelization that can occur, adding to that somewhat crusty and chewy bread quality.  Many regions of the world have their version of a “flat” bread:  Ehiopia with injera; India, the Middle East and northern Africa with their pita breads and naan; and many countries with types of crackers or lavash.

The French also have a wheel-shaped bread which they call a couronne (pro. coo-ROAN) meaning “crown” and to which I referred in a previous post about a recipe for Wild Rice Crown.   In France, that would be a white bread peculiar to a region called the Auvergne.  I borrowed the name for the Wild Rice Bread.  Other cultures have also used that wheel shape to make breads characteristic to their areas:  Norway has the Vorterkaker; Finland, the Hapanleipa.   The wheel-shape provides a practical way to store multiple loaves of dry bread if the wheels are threaded over a rafter which is what many of the Scandinavians did years ago.  The Scandinavians also devised many other breads which were formed into rings or wheels, or even braided and then formed into wreaths for holidays or special festivities; Iceland’s Fylltur Hveitibraudskrans (Coffee Wheat Bread Ring);  Sweden’s Saffronsbullar (Saffron Christmas Bread); Denmark’s Valnoddekrans (Wheat Walnut Wreath).  I have to stop at some point–there are too many beautifully shaped breads from around the world to name them all, but I hope these whet your appetite to learn more about the many facets of bread as art.

.

Handling Dough – Shaping Loaves

Tags

, , , , , ,

I have been puzzling over how to approach this next topic, the “how-to” of shaping loaves.   It seems to make sense in this era of YouTube to demonstrate the skill of shaping by video, rather than by written word and pictures.  My problem is this– I have no desire to see myself on video nor to have others see me on video either.  When I was younger, I played several stage roles in community theater, one of which earned me a standing ovation with much cheering when I played Ado Annie in “Oklahoma.”  That was 1983.  I’m not quite as cute as I was then.  So here’s what I propose:

1)  Watch as many YouTube videos as you can about shaping.  There are plenty of them already.   You will see that not everyone does it in exactly the same way, so there’s no one right way to do it.  Take heart in that, please.  And then practice, practice, practice.

IMG_36952) Here’s how to tell if the dough is ready to be deflated and shaped–a very reliable and simple test.  Wet your finger with water so that it won’t stick to the dough and push it into the middle of the risen dough about 1/2″.  If the dough is ready to be deflated or degassed (or sometimes people refer to this as “punched down” although I never punch–I press the dough down), it will feel spongy and the little hole you’ve made with your finger will not fill in.  There are two other responses that your dough may show you and I’ll describe them so you can know what you don’t want to see.  If the dough feels firm and seems like it wants to fill in a little when you remove your finger, it needs to rise longer.   If the dough kind of sighs and retreats as you push in your finger, it has already risen too long.  You can’t fix that; just go on to the next step and try not to let it rise too long (overproof) on the next rising.

3)  Don’t be afraid of handling the dough.  Yes, there is a living thing in the dough–the yIMG_3713east.  And you don’t want to tear the gluten strands that have been developing, but you can handle the dough.   Handle the dough purposefully but gently, rather than punching or slapping or pulling, or anything vigorous like that.  The dough must be deflated or degassed before shaping.  It can be done by flattening the dough with your hands or with a rolling pin.  This is good for the dough. For a long time, I was afraid that I would ruin the strength of the bread dough with my pressing or shaping of it, so I handled it very little and probably set several loaves down for proofing that were not well shaped and had little tension on the surface.

IMG_38224)  After the dough has been deflated (some of the carbon dioxide that has been filling all those air pockets has been released) then Laurel Robertson of Laurel’s Kitchen Bread Book recommends rounding the dough.  (I admit that I don’t always do this.) She removes the dough from the rising bin so that the dough surface is maintained intact.  In other words, after your loaf is formed, you will be seeing the very same surface dough that was exposed when you looked at it in the rising bin.  To round it up, she suggests imagining the dough like a flower IMG_3824that has opened up completely and you are going to help make it into a bud again.  Fold in edges of the dough to the center, going around until you end up with a ball shape.  Hold the ball on the table with both hands and apply a little pressure as you give the ball a little turn.  Doing this a few times increases the surface tension of the skin .  Notice in the picture to the left, the bottom of the ball of dough has sort of pulled itself together more tightly after having turned the ball a few times on the work surface.5 minute rest before shaping and final proofing.

IMG_37555)  Dough needs to rest a little while (5-10 minutes) after rounding before it is shaped into whatever type of loaf you want.  This is the time to prepare whatever pan or banneton you will be using for the final proof. Cover the dough up with a cloth or plastic so that the surface does not become dried out during the rest.

Lots of recipes tell you to cover the dough with plastic wrap.  Rather than using wrap from the roll, I will often use one of those plastic bags that I put my fresh produce in at the grocery store, assuming that the bag didn’t get too wet and yucky.  If it’s only slightly damp inside, I just turn the bag inside out to dry and use it later.  I cut the bottom off the bag which makes the bag into a large rectangular sheet of plastic to use for covering the rising or resting bread.

6)  After the dough has risen for an hour or so (go by whatever recipe you are following) you are ready for the fun part–shaping the dough into loaves.  And that, my friend, will be the subject of the next post.

“Too Much Kitchen S*** — Hearth Baking

Tags

, , , , ,

IMG_3765If you have been following my bread blog, you may recognize part of this title, from a previous blog entitled,  “Too Much Kitchen S***”  aka Bread Making Essentials.  The term, coined by my husband, who unfortunately, cannot appreciate my interest in searching out the “perfect” kitchen gadgetry seems apt for this topic.  I shall here attempt to demonstrate the thoughtful consideration that lies behind every kitchen device that occupies space in our kitchen.  The secondary motive is to offer what I hope will be useful information for those who may wish to learn about making hearth breads.

IMG_3728In my first “Too Much —–” I identified essential bread baking equipment with the underlying supposition that the reader was going to be using bread pans.  But there are a whole raft of other beautiful breads that cry out to have as much crust as possible exposed to a hot stone, at a very high temperature.  And so, here are the items which I use to make hearth breads.

Hearth breads may be proofed as free-standing loaves on parchment paper, or they may be proofed in proofing baskets, called brotform (German) or bannetons (French, pro. “ban-e-TAH”).  The French have a long history of making breads and various techniques to produce them.  The banneton is a bamboo proofing basket which I purchased online.  I have never seen one in a kitchen store, though I have looked.  Believe me, I have looked.  I have two IMG_3730bannetons, an oblong and an oval shape.  Apparently the round banneton is extremely popular because they were on back order for a long time when I was ready to order mine.  Breads that are appropriate for a banneton are those that need the structural support during the proof, but after removal, they are able to maintain themselves adequately for the immediate transfer to a hot oven.  Hearth bread recipes will tell you if you need to use a banneton.  The banneton is not washed in between uses.  In fact, mine have never been washed.  Rather, the banneton is dusted liberally with brown rice flour which does a great job of

Wheat bran is in the bottom to make the proofed loaf easy to release from the bowl.  Other options for dusting the the proofing basket would be corn meal, brown rice flour, semolina, oat bran....

Cloth rubbed with brown rice flour and wheat bran is in the bottom..

releasing the dough onto the peel for delivery onto the hot baking stone.  A homemade alternative to a banneton might be a round bottom bowl that you line with cloth.  I would suggest you first lay the cloth out flat and rub as much brown rice flour into the weave of the fabric as you can before lining the bowl with it.  Before I bought the bannetons, I cut and sewed a circular liner for making a quite large loaf, called a “peasant” loaf.

For hearth breads that do not need the support of a banneton, I like the following method.  I cut a piece of parchment paper and lay atop a peel, or cookie sheet that will be serving as a Peel with parchment paperpeel.  Before putting the shaped loaf on the parchment, I sprinkle it with semolina flour that I keep in a handy dispensing container.  When the loaf is ready to be baked, the parchment goes into the oven along with the loaf.  The parchment can remain in the oven throughout the bake.  If, however, you move the bread in the oven, or desire to turn your bread 180 degrees during the bake, I would suggest removing the parchment at that time.  The bread will move quite freely independent of the parchment, and you will not risk the parchment sidling up alongside the oven wall and catching fire.  Ah, yes, a painful IMG_3761lesson learned.  I had two loaves baking on parchment a while back.  They were nicely browned and I thought they were done, so I pulled one of them out to test the internal temperature and decided that they could use a few more minutes.  (The recipe in Local Breads said that the loaves should have a dark, crackly, almost charred finish.)  So, back into the oven it went.  When I opened the oven 3 minutes later, the tops of both loaves were in flames.  Through my tears, I could see that the parchment was askew under the burning loaves and had apparently caught fire from the oven wall.  Sigh — they HAD been so beautiful only minutes before.  Definitely achieved the “charred finish.”  That story I hope explains why I tend to trim the corners off the parchment before popping IMG_3173it into the oven.

A baking stone is necessary for making bread that has the qualities you desire in a hearth bread.  You will notice that I have two baking stones.  The only reason for that is that I had the round stone a long time ago and it is perfectly good, but not large enough to bake as many loaves at one time as I liked.  I didn’t want to replace it with a large rectangular stone (although that would be really nice) so I

Very important to not let the parchment touch the side of the oven

Very important to not let the parchment touch the side of the oven

found a small rectangular stone to put next to the round one.  As you can see, the two still don’t fit together well, so I adjusted the height of the round stone by placing a non-glazed clay tile underneath it on the left.  Not exactly pretty, but it works for two loaves if one of them is oblong.  (The small rectangular stone also fits inside the oven on our sailboat.  More about baking on the sailboat this summer.)

The “Better Butter” to Grease Bread Pans

Tags

, , , ,

I have found an awesome little recipe that I want to share which was first published in the book, Laurel’s Kitchen, and then reprinted in The Laurel’s  Kitchen Bread Book in 2003 As I mentioned earlier, I only began baking bread in 2009, and have made 100+ types of bread since then, probably half of them baked in loaf pans, and the other half baked on a stone.  I wish I had come across this handy little recipe earlier for all those pan loaves because it works so well!

With a bread dough that needs the support of the pan to maintain its’ shape during the proof, you are obligated to coat the inside of the pan with something slippery to prevent the loaf from sticking to the pan.  My mother always used lard which she took from the ample supply that sat in a little pail on the back of the stove, acquired from rendering a hog.  (You just don’t hear that much about rendering hogs these days, do you.)   She took a little dab and smeared it around on all the inside surfaces of her 11 aluminum bread pans.  It worked great.  I, however, do not keep lard around, nor do I want any.  But the following?  This is magic stuff.

"Better Butter"                  “Better Butter”

Blend:    1 c. vegetable oil with 1 c. soft butter and store in the refrigerator.  Simple!

OR, if you want it firm enough to keep at room temperature for a while,

Add:  2 T. water, 2 T. non-instant milk powder, 1/4 tsp lecithin; 1/2 tsp salt, which is optional.

I keep mine in a little tub in the fridge and take it out just before using.  It keeps forever (or close to it); it doesn’t get nearly as hard as refrigerated butter so you can easily scoop out however much is needed for greasing pans, and it is incredibly slick.  This combination is slicker than either butter or oil.  I swear that bread is eager to leap out of the pan when you remove it from the oven!  I am not 100% certain, but I think “Better Butter” may be responsible for the story of “The Gingerbread Man” running away.  (Warning:  Do not get “Better Butter” on the floor or under your shoe.  Gravity has a nasty way of reminding us it is a law to be reckoned with.)

I told you about the USA Pan loaf pans that I especially like in a previous post, “Too Much Kitchen S***”, and I raved about how nothing wants to stick to those pans, which is absolutely still true.   But I do grease them anyhow, out of habit, I suppose, and an attitude of “why not?”  For that brand and any other baking pan that you have in your kitchen, “Better Butter” works great!  Happy baking!

Wild Rice Three Grain Crown

Tags

, , , , , , ,

I want to share a recipe with you that is one of the easiest of the bread recipes that I like to make.  Unlike the first recipe that I posted, this one is completed all in one day, about 4 hours from start to finish, if you have cooked your wild rice in advance.  I have found it to be a very reliable recipe and more forgiving than some.  Molasses makes the bread darker, which I think is very attractive with the wild rice.  This recipe is an example of a more traditional method of bread making.   The recipe was IMG_2603submitted by Carol Jensen from Aitkin County, to the Make It Minnesotan! Sesquicentennial Cookbook in 2008.  I have never met Carol but I want her to know that I think she’s got a great, flavorful bread here.   It will easily accommodate whatever shape you would like to make.  She suggests a braided wreath or two loaves.  Just for the fun of it, I have made this bread into a large wheel.  Another name for the wheel shape is “crown” or couronne.  The name comes from a part of France called the Auvergne.  Apparently, in France, couronnes are usually a white bread, which this one is certainly not.  But the shape is the same and I figure there’s no harm in borrowing the shape name of a pretty bread made in France for another prettily shaped bread made in Minnesota.

Wild Rice Three Grain Bread

1 pkg active dry yeast (2 1/4 tsp)

1/3 c. warm water, 105 to 115 degrees

IMG_25312 c. milk, scalded, cooled to 105 to 115 degrees

2 T. canola or vegetable oil

1 ½ tsp kosher sea salt

1/3 c. molasses (honey or agave are fine, too).

½ c. uncooked rolled oats (not quick-cooking oats)

½ c. rye flour

2 c. whole wheat flour

4 to 4 ½ c. white bread flour (protein content 10%)

1 c. cooked wild rice  (I keep cooked wild rice in my freezer and thaw completely)

1 egg, beaten with 1 T. water

IMG_3524Handful of sunflower seeds

Scald the milk.  While it is cooling, measure out the flours and other ingredients.  Use your instant read thermometer to monitor the milk as it cools.

In a large bowl, dissolve yeast in the warm water.  After waiting for the yeast to foam, add the milk, oil, salt and molasses.  Stir in oats, rye flour, whole wheat flour and 2 c. of the bread flour to make a soft dough.  (Leave the remaining 2 1/2 c. of bread flour in a separate container and use from that when the recipe says to add more flour.)  Add the cooked wild rice and mix just till it’s integrated.  Cover and let rest 15 minutes.  Stir in enough additional bread flour to make a stiff dough.

Turn out onto your work surface and knead for about 10 minutes.  Add more flour to keep dough from sticking.  Turn the dough into a lightly greased bowl and roll it over so that all of the dough has a bit of oil on the surface.  Cover and let rise until doubled, about 1 hour.  Punch down or “degas” the dough.

IMG_2526To make the crown:  Prepare either a peel (if you will be baking on a baking stone) or a cookie sheet with a sheet of parchment paper and sprinkle the parchment with semolina flour.  Alternatively, you could spray the parchment with your high heat pan spray. Then, form the dough into a large round (about 14″ in diameter) on the parchment paper.  Insert a finger into the center of the dough and widen to a circle ~ 5” diameter.  You may grease a tall biscuit cutter and place inside the circle if you want to maintain that large circle as you proof the bread and bake it, but I think it’s just as nice when the hole nearly closes up again as it rises.  If you think that your crown has become too large after you opened up the circle in the middle, you may tuck under some of the dough all the way around the outer edge.  As I said, it is a very forgiving dough.

To make a braided wreath:  Prepare the same parchment as described above.  Divide the dough into three equal portions and roll each out into a long strand, at least 30″.  To roll, place your hands in the middle of the strand, and as you roll the dough back and forth, move your hands farther apart.  The dough will be elastic and may not want to cooperate at first.  Just let the strands rest for a few minutes and then return to rolling them.  They will have relaxed and be more willing.  Then braid the three strands together, pinching each end closed and make a circle (wreath) with the braid.  You may overlap the ends of the braid just a bit and seal with a wet finger.  When it rises, it will seal itself together anyway.

To make loaves:  Divide the dough into two equal parts and shape each into a loaf just a hair shorter than the length of your loaf pan.  Place each into a 9 1/2 X 5 1/2-inch greased bread pan.

Preheat the oven to 375 F.

Let the crown, wreath or loaves rise until doubled, about 45 minutes.  Beat 1 egg and mix it with 1 T. water.  Using a pastry brush, brush the top of the bread with the egg glaze.  Then sprinkle with sunflower seeds.  You may score or slash the crown or the loaves if you wish with a very sharp serrated knife or razor blade or tool called a “lame” (lahm) which is designed for that purpose.   Bake in the preheated oven for 30 to 45 minutes or until the bread sounds hollow when tapped.  I recommend checking the internal temperature of the loaf with an insIMG_2529tant read thermometer which should read AT least 195 F.

Allow the bread to cool for one hour on a cooling rack before slicing.  This is a pretty bread to bring to a potluck.

Continue reading